Advice provided to those attending our stone repair training days, looking at lime-based plastic stone repair
Repairing stone using lime-based materials is a traditional and effective method for preserving the integrity and appearance of historic and natural stone structures. Below is a step-by-step guide on when to consider this repair method and how to repair stone using lime-based stone repair materials.
Stone in buildings is susceptible to decay and deterioration due to various environmental, physical, and chemical factors. Here are some of the main reasons why stone suffers from decay:
1. Moisture Ingress, water movement and salt efflorescence:
- Moisture can penetrate the stone through cracks, joints, and porous surfaces, leading to deterioration over time.
- When water trapped in the stone freezes, it expands, resulting in cracking and spalling when it thaws.
-Sulfate attack is made possible by excessive water movement within walls. The chemical reaction can significantly damage brick and stone buildings, particularly those with porous materials such as limestone, sandstone, and handmade bricks. This phenomenon can cause spalling, cracking, and overall deterioration of the stone or mortar. Sulfates can originate from various sources, including groundwater and soils containing significant amounts of sulfate minerals, which can leach into adjacent structures. Historically, sulphur compounds from industrial emissions can fall as acid rain or be deposited on surfaces and react with high calcium lime mortars. Sulfate ions can react with calcium compounds in the stone or mortar (such as calcium hydroxide) to form gypsum (calcium sulfate dihydrate). This reaction alters the physical structure of the materials. The formation of gypsum can increase the volume of the material within the stone or mortar. This expansion leads to internal stresses, causing cracking, spalling, and overall deterioration.
-Water Permeability: Water entering stone or mortar can carry dissolved sulfate ions into the material structure.
- Inadequate drainage around or near stone buildings can lead to water accumulation, increasing the risk of sulfate ingress and ensuring that sulfates and other pollutants remain in contact with the stone for extended periods.
-Use of Unsuitable Materials: strong cement mortars can encourage adjacent stone and brick to deteriorate at an accelerated rate of decay and may also contain higher levels of soluble sulfates, increasing the potential for sulfate attack.
- Wind erosion: in some coastal areas, wind erosion of stone can be severe, as the buildings are almost constantly sandblasted.
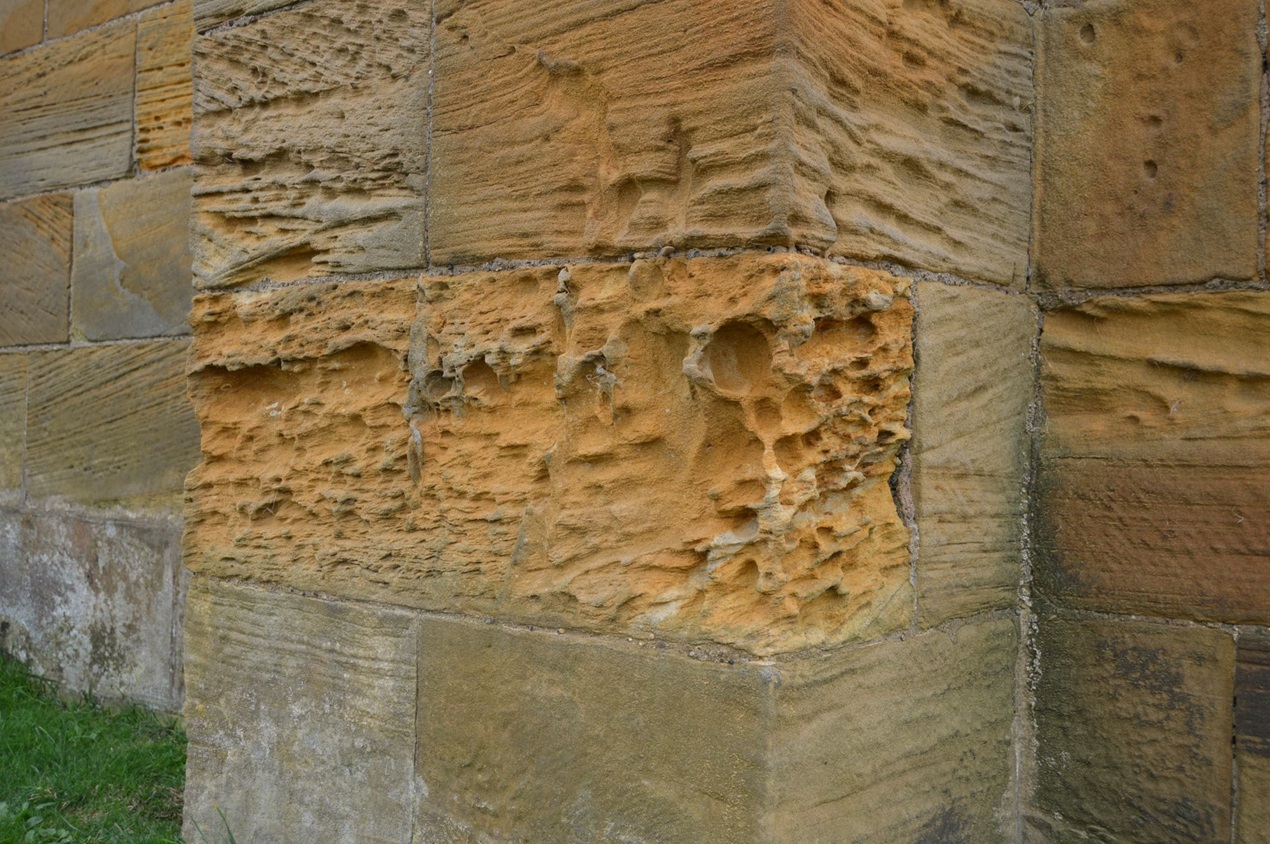 Wind erosion at St Marys, Whitby
2. Poor Maintenance
- Inadequate maintenance practices can lead to the accumulation of dirt, grime, and biological growth, which can contribute to decay.
- Failure to address poor detailing, install lead flashings, or repoint mortar loss with lime-based mixes can lead to more significant deterioration over time.
3. Chemical Weathering
- Rainwater with high acidity levels can react with certain types of stone (especially limestone or marble), leading to chemical breakdown.
- Airborne pollutants, such as sulfur dioxide from industrial emissions, can combine with moisture to form acidic compounds that damage stone surfaces.
4. Biological Factors
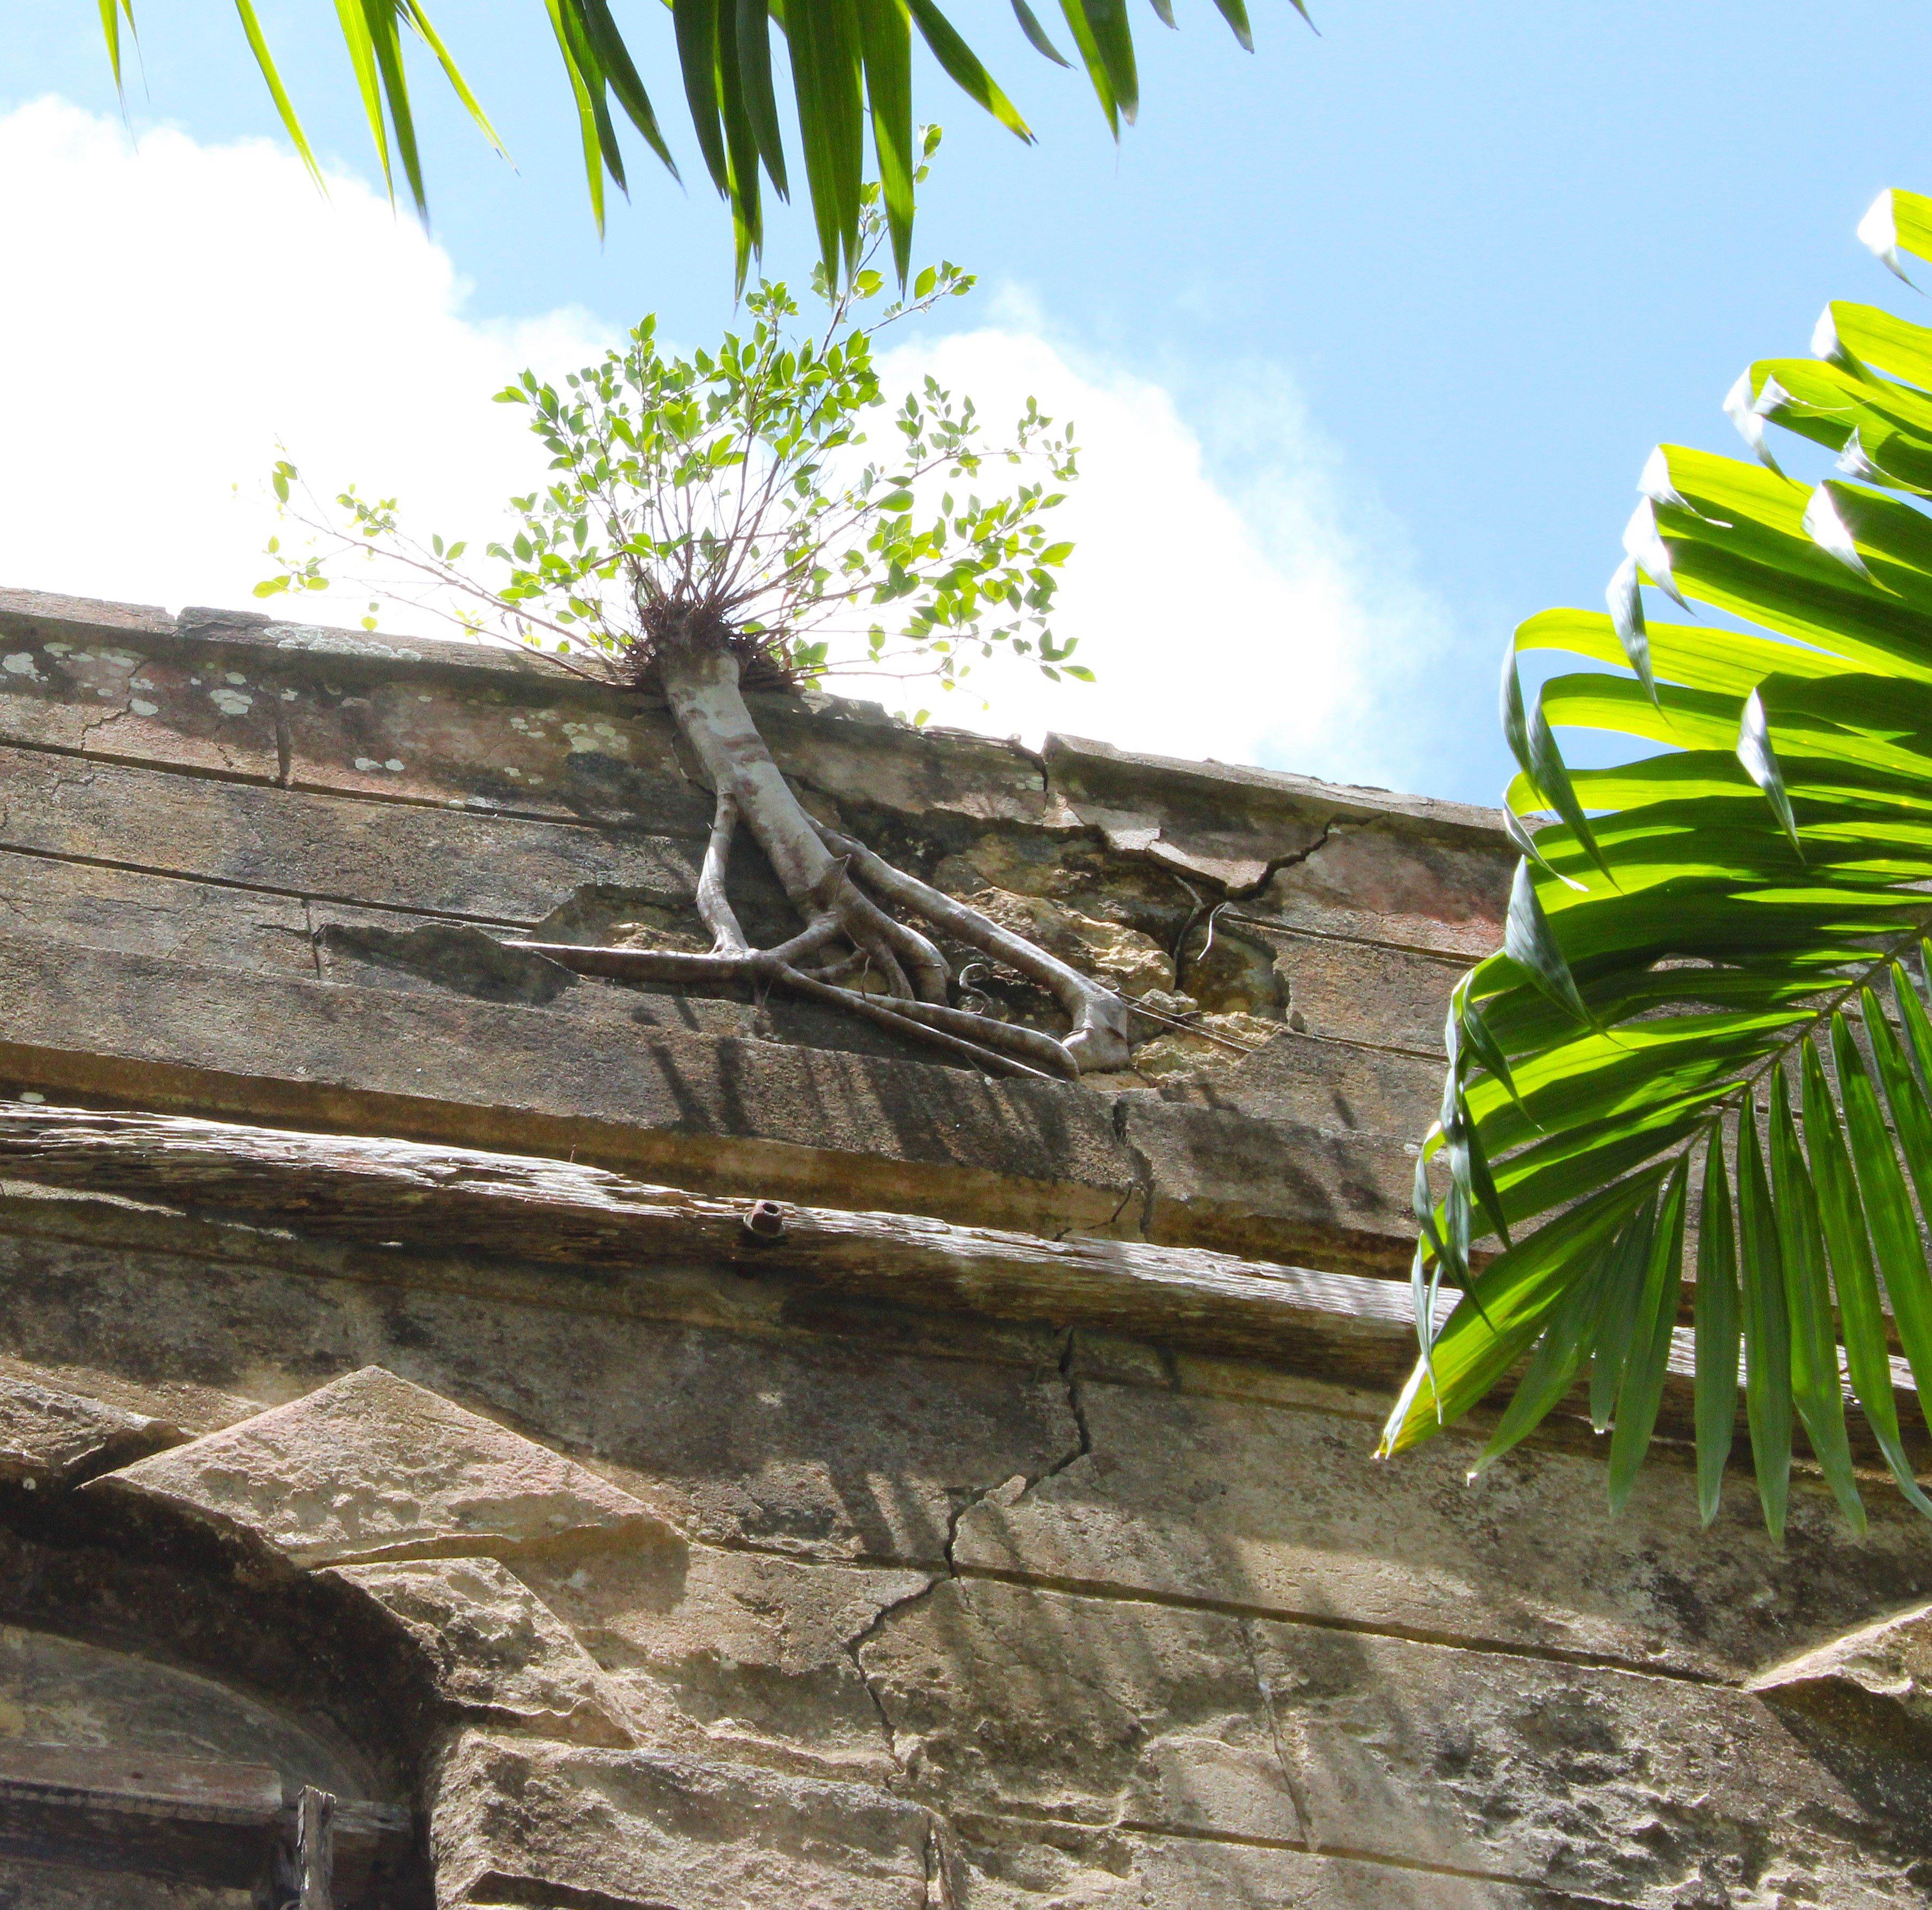
- Roots from plants and trees can penetrate cracks in stone, exerting pressure and causing further damage.
- The organic growth of moss and lichens can hold moisture against the stone, promoting decay and weakening the stone substrate.
5. Thermal Expansion and Contraction
- Changes in temperature can cause stones to expand and contract, leading to cracking and fragmentation, especially freeze-thaw action in the wet and cold UK climate.
- Stones subjected to intense heat during localised fires in buildings can experience thermal stress, causing surface flaking or discolouration, as iron in sandstones rusts excessively.
6. Inappropriate Repair Materials
- Using modern cement-based mortars or water sealers that do not allow for breathability can trap moisture within the stone, accelerating decay.
- Incorrectly carried out repairs can introduce stress points in the stonework, leading to further deterioration.
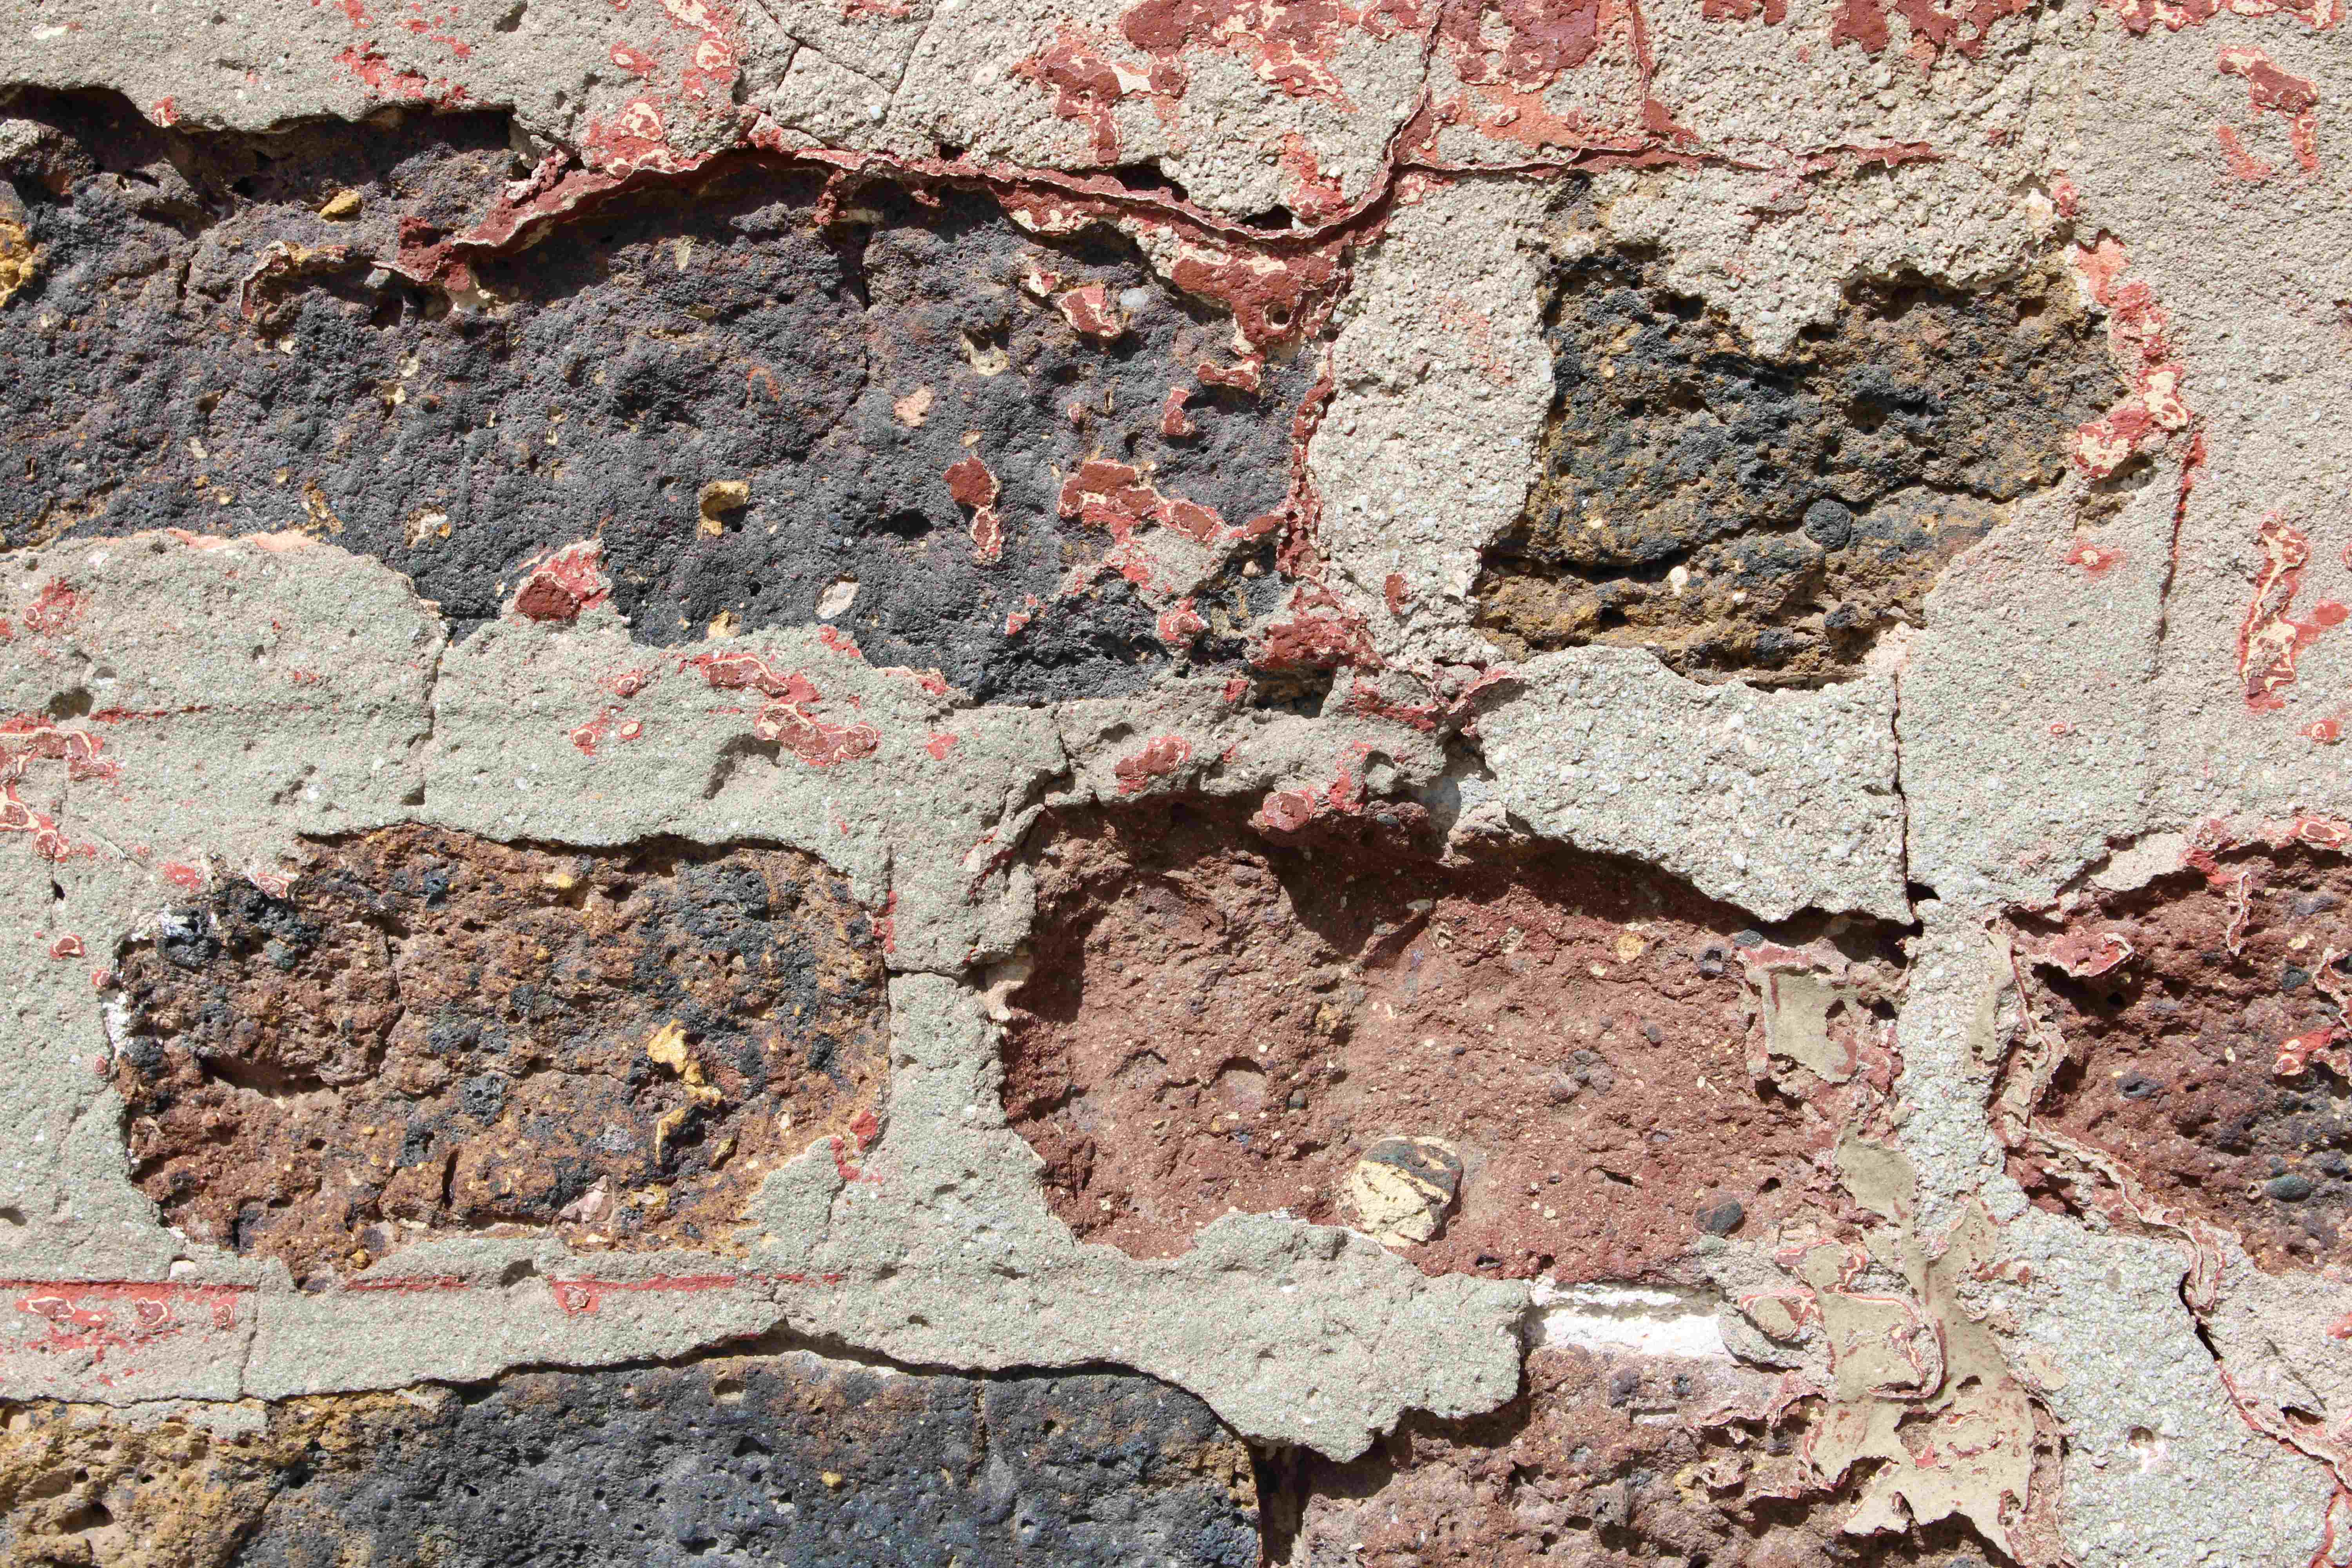
- The use of iron cramps and later fixings in buildings within the external stone and brick walls can cause the stone and brick to crack and fail if the iron begins to rust and expand.
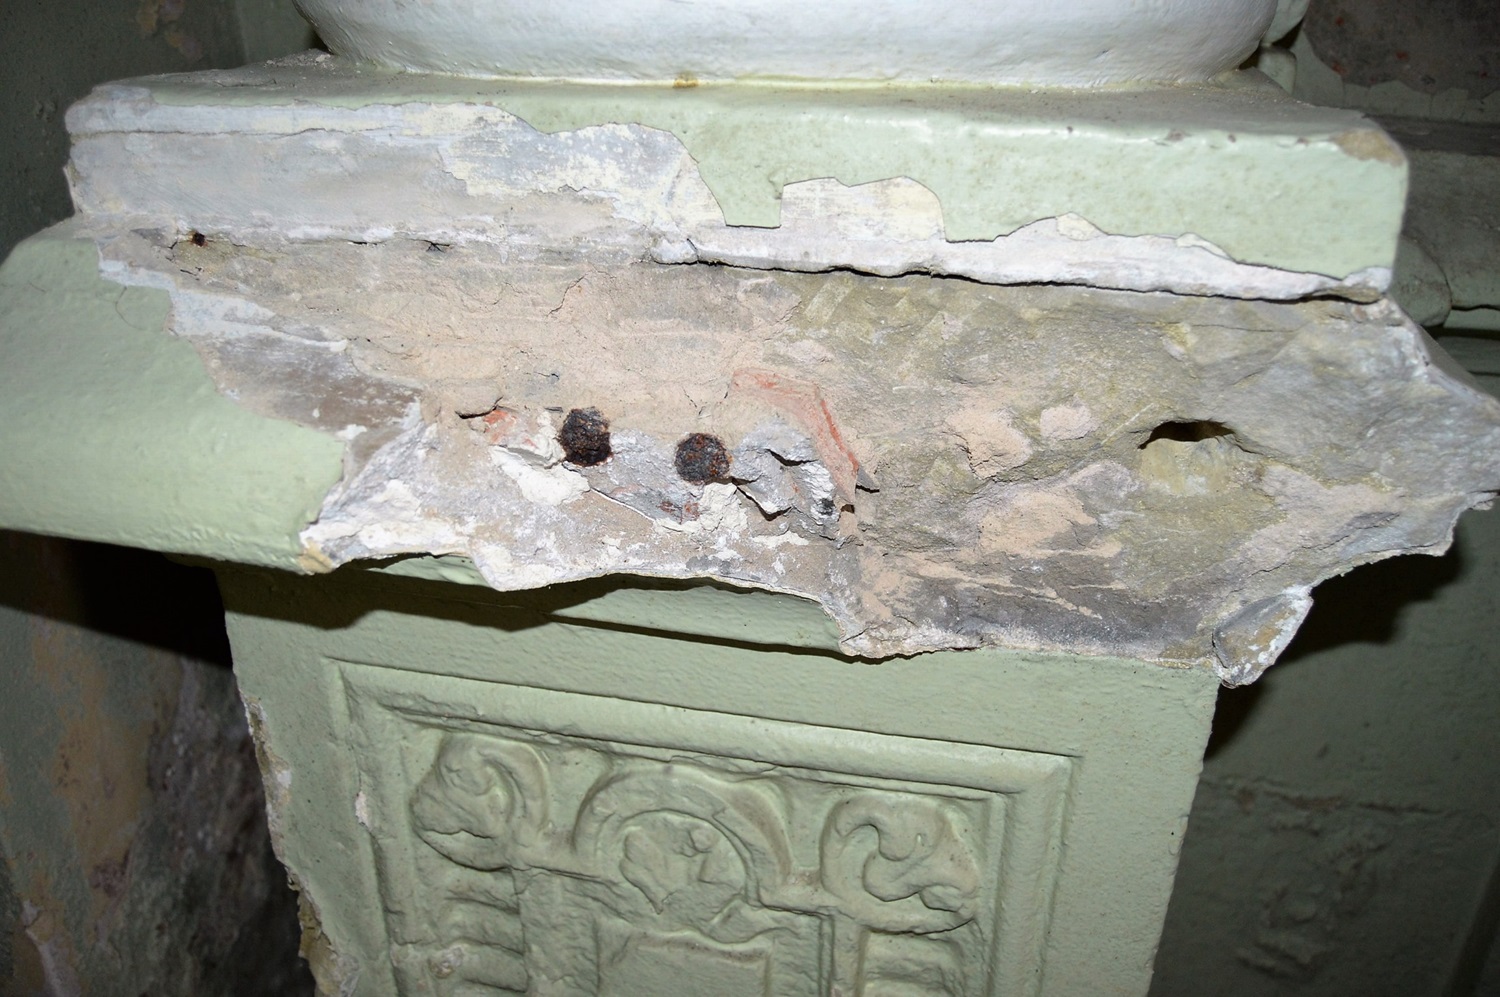 Rusting iron dowels have shattered this stone capital.
7. Structural Movement
- Inadequate foundations in the building or movement due to former mining activity or sinkholes can cause stresses in the stone, leading to cracking or dislodgment.
- Heavy machinery, vibrations from traffic, or nearby construction can also lead to structural issues in stonework and mechanical damage.
8. Design and Construction Issues
- Poorly designed drainage systems can lead to water pooling around or against stone structures and not draining away from the building quickly, promoting decay.
- Initial design flaws, such as using sandstone over limestone, can lead to vulnerability and decay in the sandstone's silica compounds.
Final comments
The decay of stone in buildings is often a combination of several factors. The reason for underlying decay needs to be dealt with before stone repair begins. Regular inspections and proactive maintenance measures are vital in mitigating stone decay. M Womersleys can help guide the identification of the underlying problems and developing solutions.
Considerations before commencing a repair project
Before the commencement of any repair, the following will need to have been considered:
- Is the building listed or in a conservation area?
- Is access equipment required, such as scaffold drawings and calculations, pavement licence, sheeting, etc?
- Has the building been cleaned, repaired, or treated with other materials before, as previous methods could affect subsequent work? Architects, building owners, or local authorities may have this information. Further research into local archives may be necessary.
-Why is the building being repaired? This could be for several reasons, including limited remedial work or more serious structural problems, alterations, or maintenance. Aesthetic reasons may come into play if, for instance, it is a public building or it is the headquarters of a company and is promoting an image.
- Cleaning might be required to reveal essential repair requirements.
- You will need to comply with all current Health and safety regulations and consider the building’s function, for example, is the building in use, such as offices or retail premises?
- Before the commencement of the project, repair samples should be prepared at different locations on the building.
- Removal of electrical and plumbing fixtures and fittings, where required, should be carried out by an authorised person
Selection of repair methods and producing a schedule of repairs
The choice of repair method should be based on a thorough assessment conducted during the planning stage, and it may require the use of multiple techniques. If high-level repairs are necessary, the expense of scaffolding becomes a critical consideration; thus, it is essential to select a durable repair method, especially for repairs located higher up on the building.
Conducting a comprehensive repair schedule from ground level is challenging, so it's important to consider providing access for high-level inspections. Options for access may include lightweight scaffolding, mobile towers, mobile access platforms (like cherry pickers), or rope access systems managed by a specialist company. Any repair schedule will be merely an estimate without adequate access and may need adjustment once actual access is granted.
While scaffolding is in place and incurring project costs, it is advisable to prioritise high-level repairs that can only be accessed through the scaffolding.
Finally, always create a detailed report documenting the repairs completed, including the methods used and a photographic record, along with any maintenance recommendations.
Methods of repair
The selection of repair methods is affected by the type of material involved, the condition of the surface being repaired, and considerations of convenience and cost. Choosing the correct method is crucial and requires careful evaluation of the stone's condition, type, and location within the building. Inappropriate repair methods may not only be ineffective but could also cause additional damage to the structure.
Different repair techniques necessitate specific skills, and not all operatives possess expertise in every method. Conservation work requires specialised training, so it is essential to consult with competent contractors.
While specifications may state "repair to match existing exactly," achieving an exact match is often unrealistic, as the surrounding stone will have weathered over time, making a perfect match difficult or even impossible.
The outlined methods of repair provide an overview. Still, it is highly recommended that professional advice be obtained from M Womersleys, who deeply understand historic buildings and stone conservation.
Repair
When a stone has sustained partial damage or weathering but remains fundamentally sound, it can be repaired by cutting out the affected area and inserting a new piece of stone specifically shaped to match the original. This process is commonly referred to as indenting.
Renewal
If a stone has been damaged beyond repair, complete replacement is necessary. Care must be taken during removal to ensure that neighbouring stones are not damaged or undermined, as this could compromise their safety.
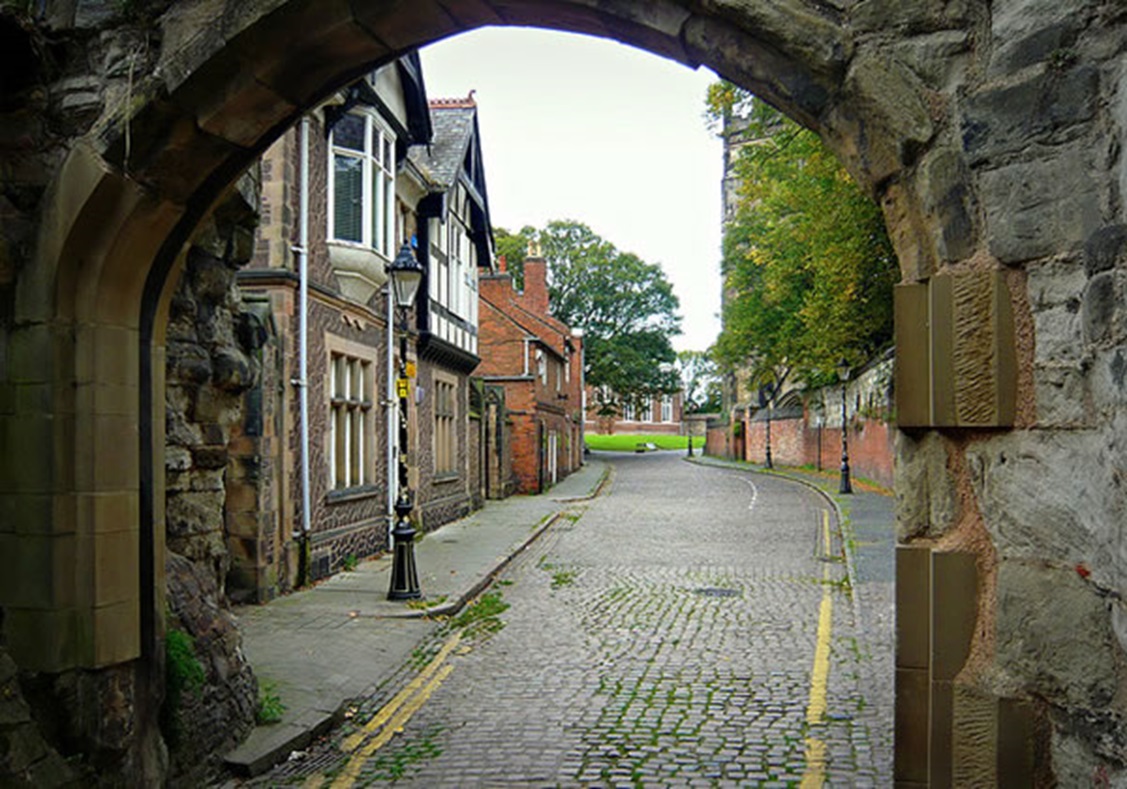 New stones were inserted at the entrance to the castle compound in Leicester
Restoration
Localised damage to masonry can be addressed by removing the affected area and filling it with appropriate mortar or resin repairs. Historically, these repairs have been called "plastic repairs," as the early lime mortars used for this work were plastic and malleable and could be shaped to the profile of existing stones, mullions, jambs, and quoins. The repair mortar should not be harder than the original stone and should be considered sacrificial. Below are the materials and techniques that can be used to carry out a “plastic” conservation-based stone or brick repair with lime-based mortars.
Selecting the correct stone repair mortar
The indiscriminate use of replacement stone in these situations has resulted in many buildings being clad with thin layers of new stone that rarely match the original's characteristics. This often leads to invasive interventions in what were otherwise stable structures. Many of these thin layers are supported by concrete, brick, or other unsuitable materials and may have significant voids behind the new veneers.
The materials used must possess specific characteristics for surface repairs to be effective. They should:
- Be similar in characteristics to the host masonry.
- Provide adequate bond strength.
- Have a suitable modulus of elasticity.
- Be vapor permeable.
- Demonstrate durability.
- Allow for working with tools similar to those used on the original masonry.
- Remain workable long enough to achieve the desired detailing.
- Match in colour and texture.
- Absorb water adequately during wetting and drying cycles to align with adjacent masonry.
- Always be reversible.
Conversely, they should never:
- Become significantly stronger than the surrounding masonry.
- Exhibit a substantially lower rate of absorption or adsorption than adjacent units.
- Create a barrier to diffusion.
It is important to note that materials that meet these criteria do not necessarily have to replicate every characteristic of the host masonry.
Selecting the correct stone repair material. M Womersleys can help advise on the best mixes for an individual job and will consider the following factors:
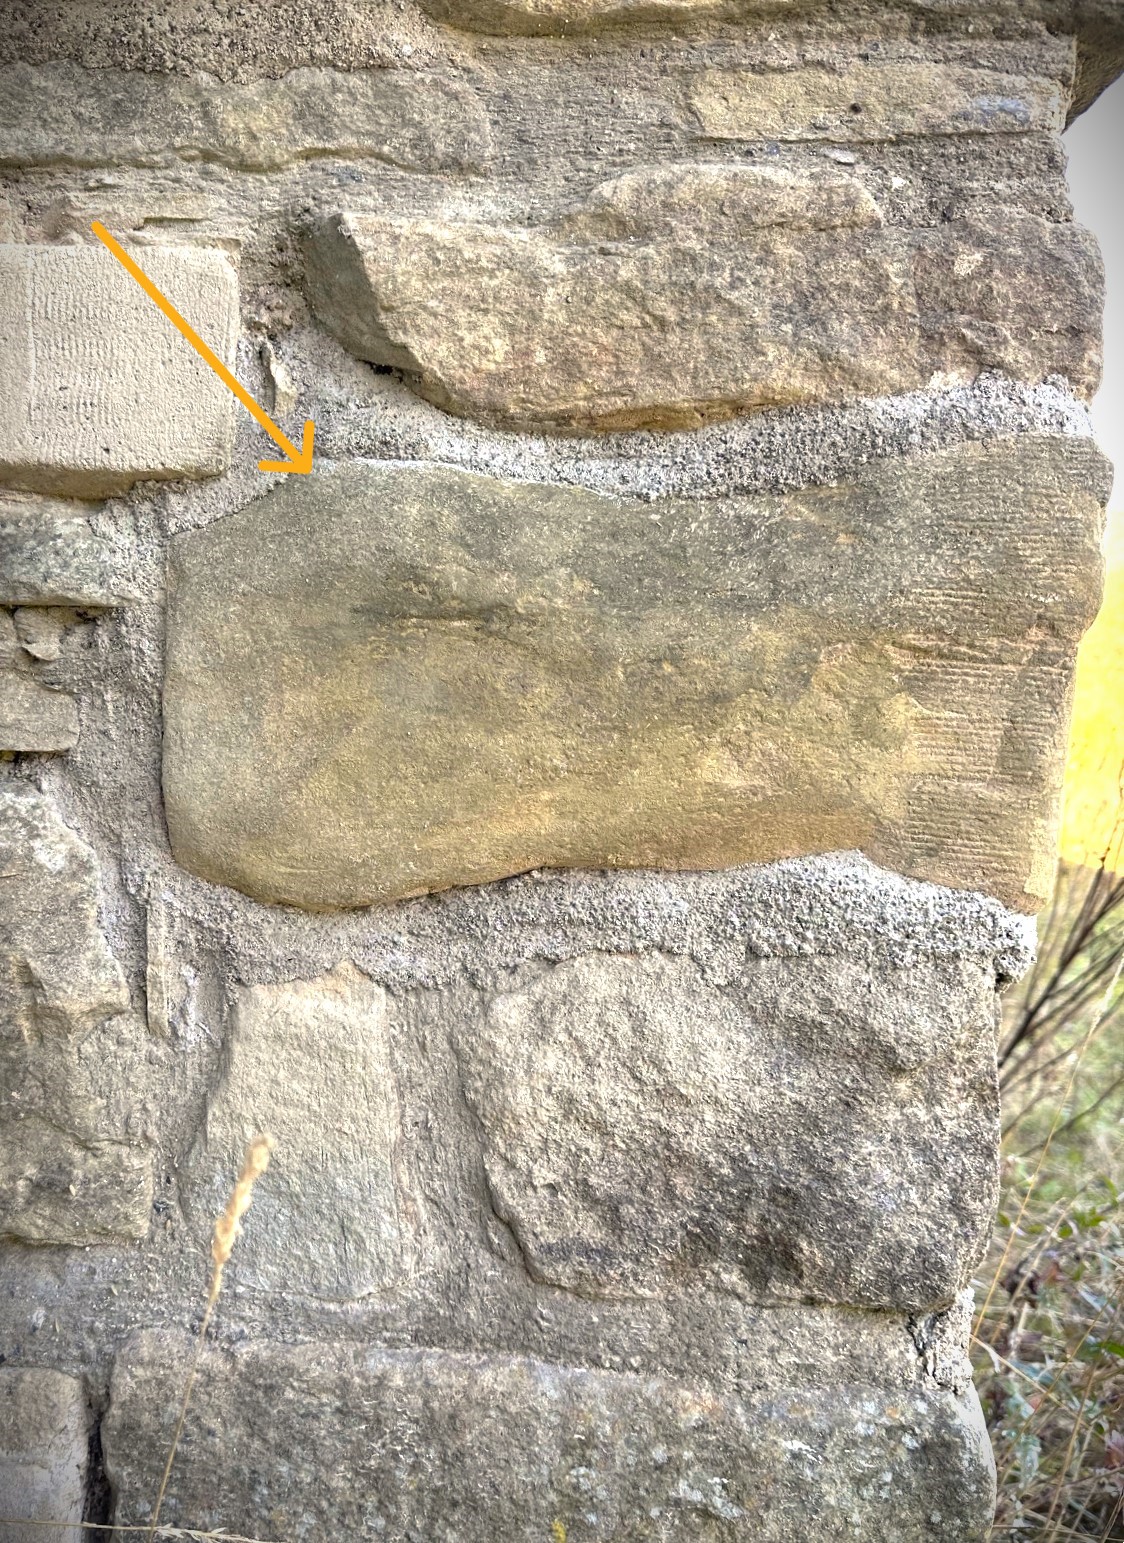
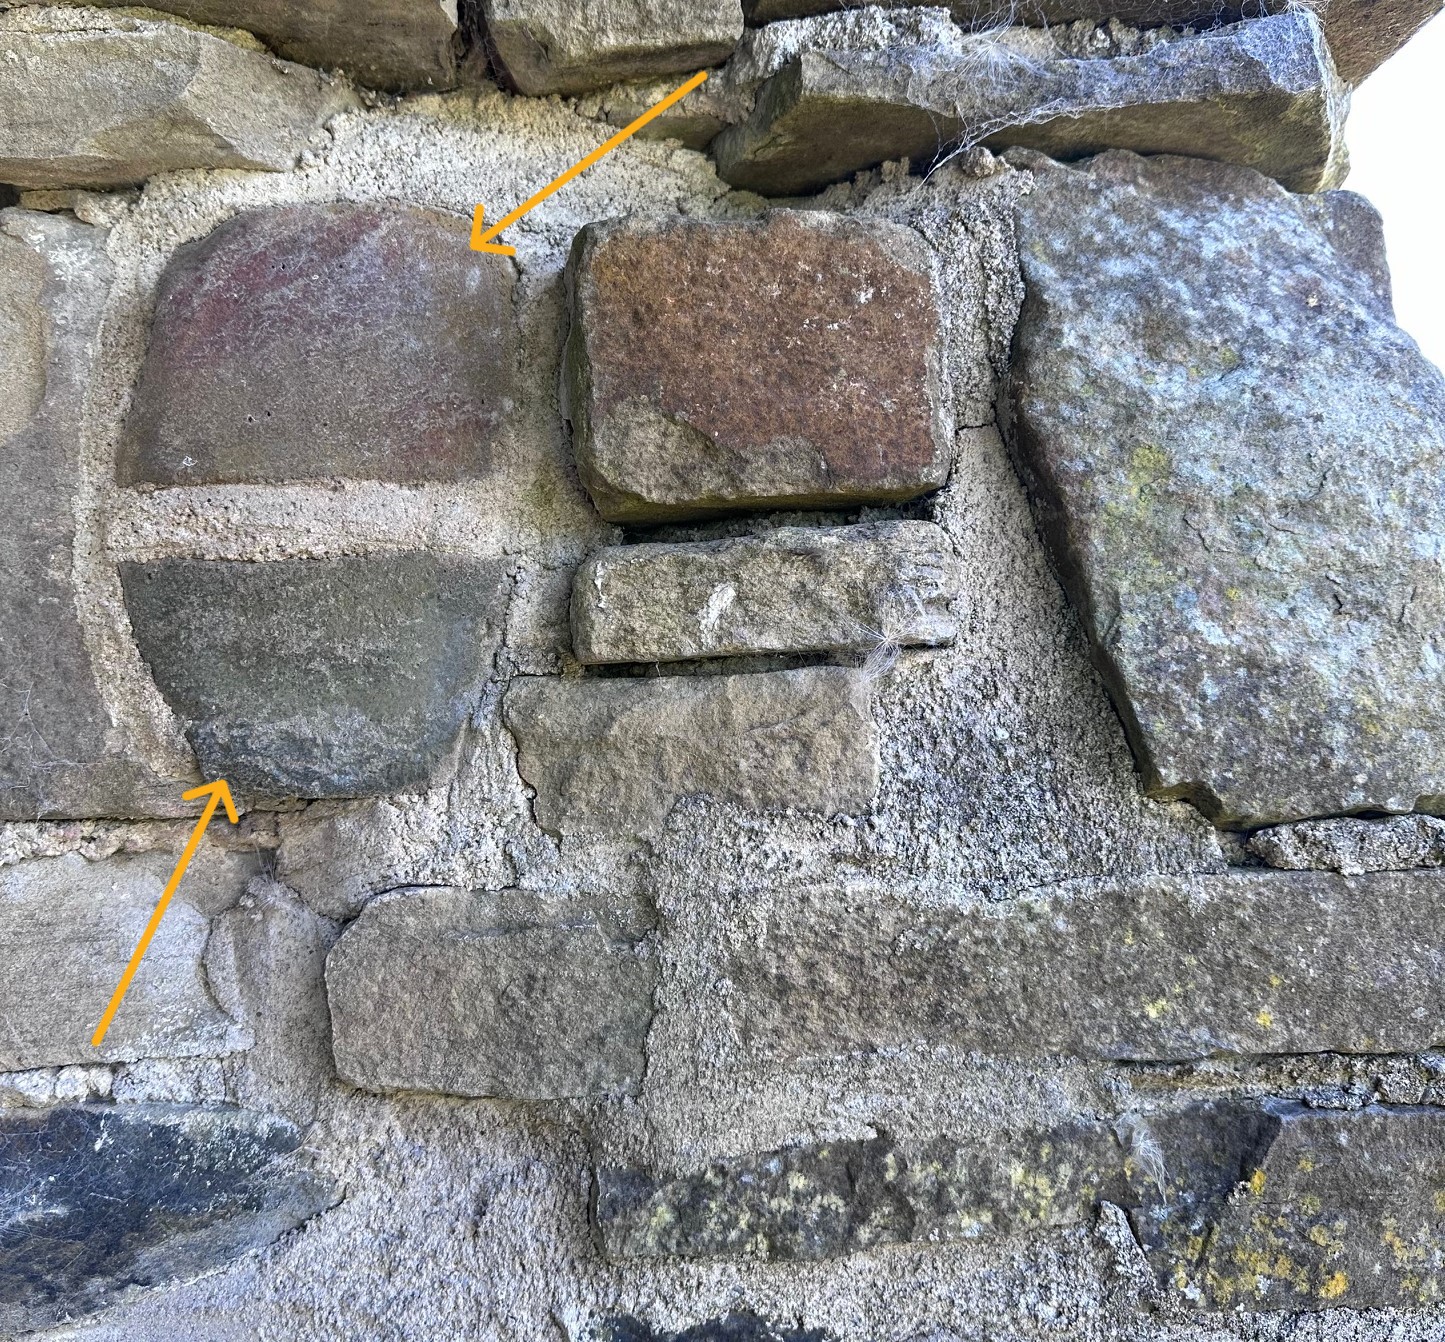 Stone repairs using lime-based mortars completed on recent training courses
Colour
The primary visual characteristic of masonry is its colour. Matching colours can be subjective, as different individuals perceive colour differently. For example, many men experience varying degrees of red-green colour blindness, so one person may view a colour match differently from another. However, colour matching is generally manageable by selecting appropriate aggregates and stone dust or accurately colour matching using proven lightfast mineral pigments.
Correct finishing techniques
The finish of a repair material often depends on the applicator's technique rather than the material's inherent properties. If the material can be worked appropriately with traditional tools after it has set, it will yield good physical matches. St.One® and some other good quality lime-based stone and brick repair mortars are compatible with standard masonry tools and can be shaped by skilled operatives during installation.
Absorption
Absorption refers to the process by which materials take in fluids to fill their voids, and it can vary based on factors such as surface finish. The finished repair mortar must have characteristics similar to the original masonry. Demonstrations have shown that correct repair mortars can absorb water onto their set and hardened surface at similar rates to the adjacent stone being repaired.
Ageing
Ageing refers to the natural alteration of properties and appearance of materials over time, often influenced by the previous two characteristics. Correctly specified repair mortars weather over time due to absorption and exposure, becoming sufficiently absorbent to take in pollutants, although not excessively.
Breathability
The ability of a building material to allow moisture to move to the surface and evaporate is crucial. The repair material should match or exceed the breathability of the existing masonry; the higher the breathability of the repair material, the more quickly moisture can escape from the host masonry. Correctly specified repair mortars offer high breathability due to their vapour permeability.
Capillarity
Capillarity is the ability of a material in contact with water to draw it upward through capillary channels. This property is generally undesirable in construction or repair materials. Capillary pores are commonly found in dense cement materials, trapping water and reducing evaporation. While some naturally occurring sandstones possess a degree of capillarity, it is rarely continuous.
Porosity
Porosity defines the volume of pores within a material and impacts the durability and breathability of the masonry and the repair material. The porosity of these materials is determined by pore size, which varies widely and can be classified into three main categories based on access size:
- Micropores: Less than 2 microns in diameter
- Mesopores: Between 2 and 50 microns in diameter
- Macropores: Larger than 50 microns in diameter
Matching porosity isn't always essential; what's vital is maintaining good breathability, which depends on the extent and interconnectivity of the pores. There are two significant types of pores: closed and open. Closed pores are isolated from the external surface and do not allow the entry of external fluids, influencing properties like density and thermal behaviour. On the other hand, open pores are accessible to fluids and can be further divided into dead-end or interconnected pores.
Suitable repair materials should possess interconnected pores featuring a microporous structure with tiny holes approximately 5 microns in diameter interlinking across the broader pore structure. Since water droplets typically range from 500 to 5000 microns in diameter, they require substantial pressure to pass through micropores. Consequently, the material offers reasonable waterproofing, while much smaller water vapour molecules (typically less than 0.0003 microns) can easily pass through, allowing moisture to escape. Although correctly specified repair mortars have some porosity, they are not linked to capillarity.
Modulus of elasticity
The modulus of elasticity is critical for determining a material's ability to flex under stress during curing and through subsequent thermal and physical movements. A lower modulus indicates greater flexibility.
Materials needed to undertake lime-bound plastic stone repair:
- Lime-based repair material (such as hydraulic lime mortar mixed on-site or a premixed stone repair material)
- Sand (with appropriate grain size and colour for mixing with lime)
- Water
- Mixing bucket or trough
- Trowels and a small hawk
- Pointing tools, putty knives and shaping plasterers' small tools.
- French drags, plasterers planes, carbide plates and Lions foot. (for shaping material has achieved an initial set)
- Chisels and lump hammer (for removing damaged stone)
- Non-ferrous Wire brush
- Plastic sheeting or tarps (for protection)
- Churn Brush and Sponge (for wetting the surface and finishing work)
- Personal protective equipment (gloves, mask, safety glasses)
Step-by-Step Guide to Repairing Stone: Undertaking the work
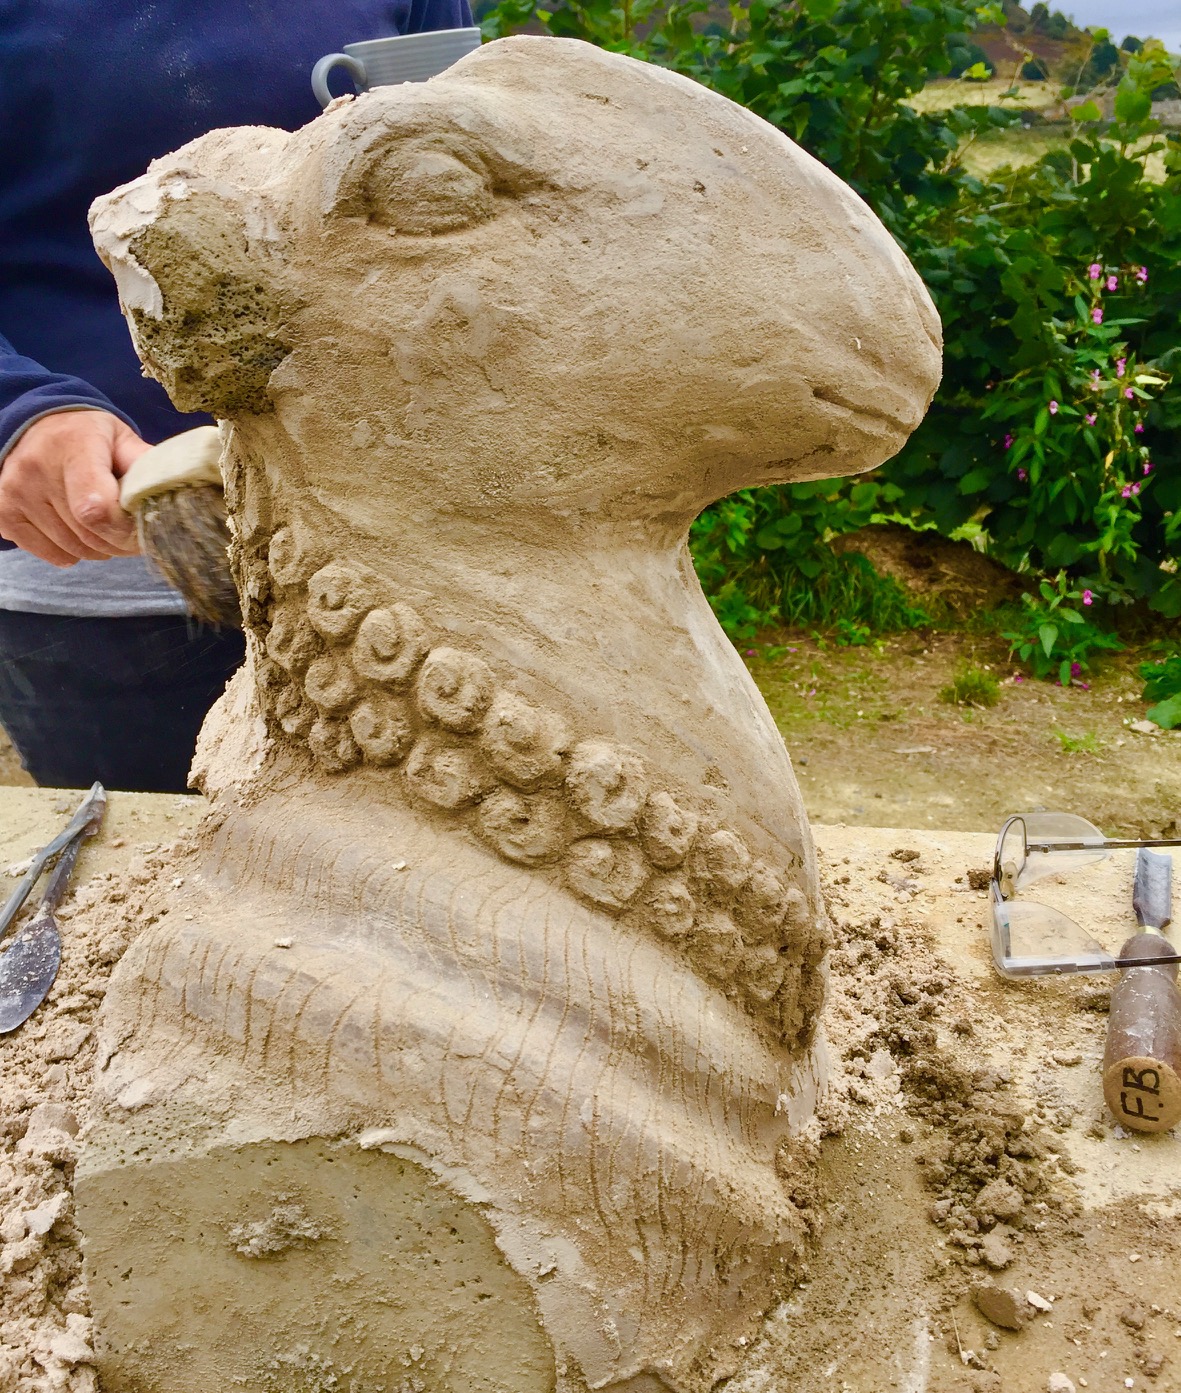 Recreating a stone sheep's head with a lime-based stone repair mortar at one of our training days
Step 1: Assess the Damage
- Examine the stone for cracks, chips, or any loose pieces. Determine the extent of the damage and whether the repair requires filling patching, or complete replacement.
Step 2: Prepare the Area
- Use a non-ferrous wire brush to remove dust, debris, or loose materials from the stone surface. Ensure the area is clean for the best adhesion.
- Protect Adjacent Surfaces, use plastic sheeting or tarps to shield nearby surfaces from dust or repair material.
Step 3: Remove Damaged Material
- If there are loose or severely damaged parts of the stone, carefully use a chisel and hammer to remove them. Be gentle to avoid causing further damage to the stone or surrounding area. Ensure the repairs will not feather out, and use scutch chiels or similar tools to undercut areas in the stone as required.
- Create clean edges around the damaged area for better adhesion.
Step 4: Prepare the Repair Material
- Choose Your Lime Mix: Depending on the type of repair needed.
- Mix the Lime-based stone repair material, ensuring it is a stiff mortar and allow it to stand to fatten up, allowing the mix to mature for a short time (around 15-30 minutes) to improve its workability.
Step 5: Dampen the Repair Area
- Lightly dampen the area to be repaired using a brush or sponge. This helps improve the bond between the lime material and the stone and ensures the repair does not dry out before it has set.
Step 6: Apply the Lime-Based Material
- Fill the Damaged Area. Using a trowel and small tools, apply the lime-based repair material to the prepared area. Press it firmly into the crevices and ensure there are no air pockets.
- Using small tools, shape and smooth the surface, ensuring it matches the original stone profile. If you intend to work the stone with masonry tools after it has gained an initial set, slightly overfill the repaired area.
Step 7: Localised colouring and distressed effects
- If required, use mineral pigments in water to fresco more colour and patterns on the surface of the repaired material or pigments in water-glass binders on dry stone repairs.
Step 8: Allow for Curing
- Allow the repair material to cure. This typically takes several days. Monitor temperature and humidity, as they can affect the curing process. Lightly mist the repaired area with water, particularly in dry conditions, to prevent rapid drying and cracking.
Step 8: Final Inspection and Touch-Ups
- Clean the repaired area of excess material or dust using a damp sponge.
Additional Tips:
- Always use lime-based materials compatible with the existing stone and mortar to ensure long-term results.
- Be mindful of weather conditions. Avoid repairing in extreme temperatures or wet conditions, which can affect setting and curing.
- Consider consulting with a conservation specialist, such as M Womersleys or a professional mason familiar with lime-based repairs for extensive damage or historical renovations.
Conclusion
Plastic repairs are more accurately referred to as patch repairs and should be employed to restore masonry's details, alignment, levels, and planes. If left unaddressed, these areas can lead to excessive weathering of surrounding masonry, accelerating the decay of otherwise sound elements. Additionally, patch repairs present a significant advantage over complete masonry replacement. In the past 30 years, much masonry has been replaced unnecessarily, resulting in the removal of predominantly structurally sound materials that have only experienced superficial weathering—often due to neglect and inadequate maintenance of essential building features like gutters and downspouts.
Utilising lime-based materials for stone repair is an effective method for restoring and preserving stonework while ensuring breathability and minimising moisture-related problems. By adhering to proper repair techniques, you can carry out durable repairs that retain the aesthetic integrity of the original stone.
Related Articles

Conservation cleaning, metal work and masonry repairs at the cemetery of St John the Divine
M Womersleys have just finished assisting students and tutors with conservation cleaning, metal work…

Guidance Sheet for burning lime, quenching, slaking and using lime for conservation work in Antigua
M Womersleys Ltd assisted the Harrison Centre to allow them to construct an active lime kiln in their…
The steps members of the Waterton’s Wall restoration team, with support from Mark Womersley, have been following to consolidate, conserve and repair this historic wall that represents the successful efforts of Charles Waterton to preserve the wildlife that lived on his estate near Wakefield in West Yorkshire.
1. Fill deep voids behind the wall’s facing stones with deep pointing work. The works involve …
